Sllack remains a top choice for real-time collaboration in 2025, with 75% of remote teams relying on it for daily communication (TechReport, 2025). Its intuitive design and new updates make it ideal for communitie
However, how do you go about creating a Slack community that is not just there on paper but that flourishes?
Key Points
- Setting up a Slack community starts with an easy sign-up process on Slack.com. This allows you to customize the workspace for your group's needs.
- Choose the right Slack plan, from Free to Business+, to get the necessary features while staying within budget and meeting community requirements.
- Organize your workspace with channels and invite members; set clear guidelines and use features like @mentions and dedicated channels to enhance communication and engagement.
Who Is Slack Best For?
Slack is great for those who want to be hosts in the following areas:
- A community based mainly on communication
- A place where they can keep in touch or network constantly
- A group of people who work as a team on a project of common interest
- A small group of fans, professionals or learners
This is by no means an exhaustive list, however, some of the things that creators might want to avoid Slack for include:
- Hosting of an exclusively paid event
- European courses
- The organizing of live events or streams
- Getting free support and direct access to data about members and their purchases
If you are through your community developing a business, Mighty Networks or Circle, for instance, are more suitable. On the other hand, if it is mainly about following a narrow chat-based way of exchanging information, Slack serves as a strong one (and also an easy one).
Step-by-Step: How to Create a Slack Community

In this guide, we will spend time with you in every step starting with the definition of your purpose to managing channels and keeping your members engaged. If you are new to Slack and are just at the stage of doing a feasibility study or on the other hand you are planning to launch immediately, this guide will help you in building a highly interactive, efficient, and organized community.
1. Define Your Community's Purpose and Audience
First, don’t rush to open Slack and hit "create," but instead, spare some time to do the following:
- Write down what your community is up to.
- Who it is that you are addressing?
- Work towards solving the problems of the folks or offering them something new that will be beneficial
Make sure to come up with a simple Big Purpose Statement:
“We bring together [target audience] so they can [what they want] without [a problem they face].”
You can also choose to take an extra step by creating an “ideal member avatar.” Conduct interviews with 10–20 prospective members to find out about their targets and problems. The information you gather will act as a foundation for your channel structure and even your choice of tone.
2. Sign Up on Slack and Pick Your Plan
Go to Slack.com and press the "Get Started" button to make your workspace. It’s fast—you just need your email.
There are several plans offered by Slack:
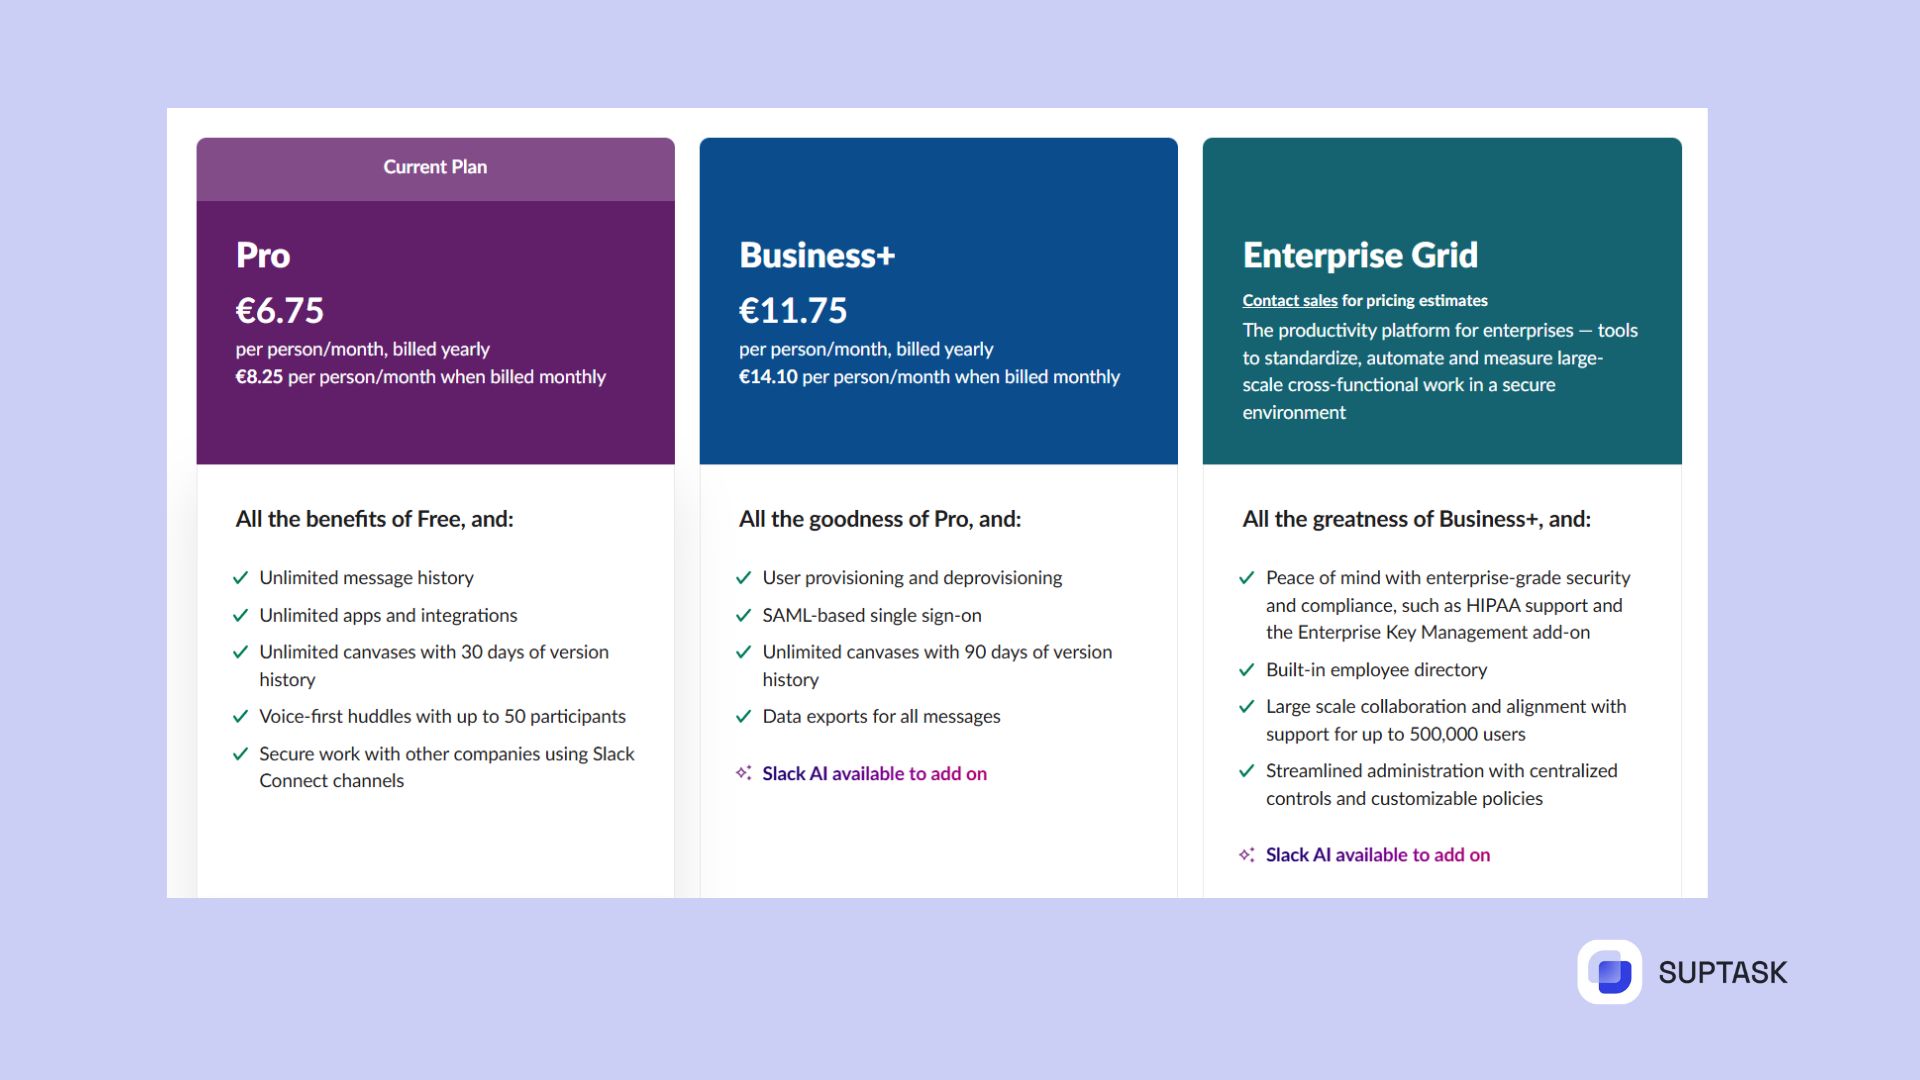
Simply choose the one that matches your goals and budget. You can always enjoy a free start and later move up to better infrastructure.
lack’s 2025 updates include:
- AI-powered search (quickly find past messages/files).
- Expanded free plan (now includes 90-day message history, up from 30).
- Threaded polls (vote directly in threads).
- Improved video calls (up to 50 participants on all plans)
3. Create and Organize Channels
Channels are at the heart of your Slack community. They allow you to categorize your conversations based on the topic, interest, or the function of...
Steps in creating a Slack Channel:
- On desktop: Click the "+" near "Channels" → "Create a channel"
- On mobile: Select "Home" → "Add channel" → "Create Channel"
The channels are:
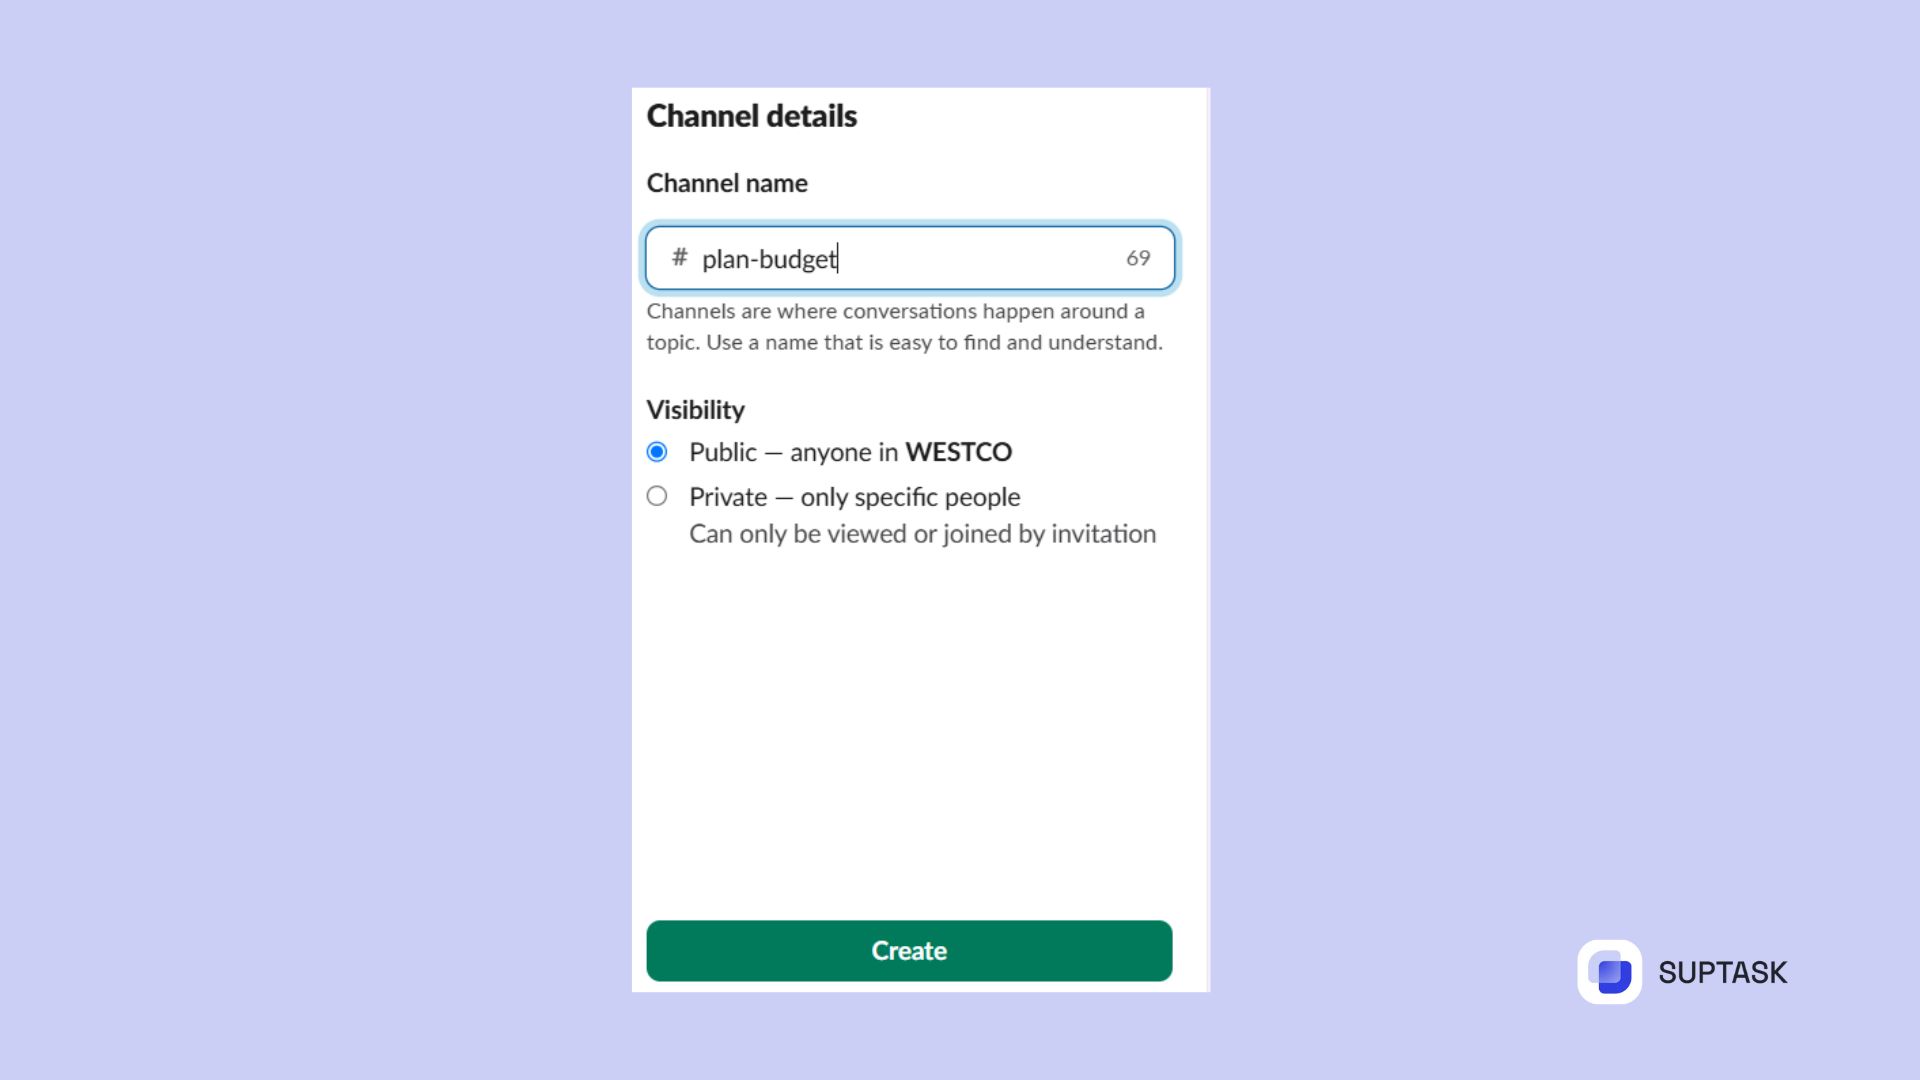
- Public – available for all in the workspace
- Private – accessible only by members who have been invited
Catching examples of helpful channels are:
- #introductions – for new members to introduce themselves
- #general – community-wide announcements
- #help or #ask-anything – questions and support
- #random – off-topic fun
- Channels focused on specific topics (e.g., #marketing, #writing-prompts, #fitness-goals)
Only a small number of channels should be made available initially, and one should not overcrowd
4. Invite Members to Join
Inviting members to join is quite simple. Here are some methods:
- Send email invitations from the Slack dashboard
- Share a hyperlink leading to the invitation page (which can handle at most 400 attendees)
- Customize your invitations with expiration dates and access levels
Pro tip: Assign different teams of channels to your new members and then share a welcome message with the community guidelines, tone, and also how to get started.
5. Kickstart the Conversation
When there is a new joiner, the responsibility falls on you to open the chat. This is a good way to prevent the “silent Slack” syndrome by getting people to participate in the conversation.
Here are some suggestions for you to foster the conversation:
- Create a welcoming post in #introductions with a pre-prepared template
- Plan a weekly topic (e.g. "Motivation Mondays", "Feedback Fridays")
- Spotlight member contributions with a “Spotlight” post
- Use Slack’s new /poll command (e.g., "Coffee or tea?").
- Pin a monthly #wins channel for achievements.
- Offer articles or resources that fit the main topic
- Make use of @mentions to involve specific persons
- Try Donut (auto-matches members for chats) or Geekbot (standup reminders).
You should always support the persons who are early members to be the moderators or even the first to start the talks. When other people see some real interactions, they may take and join.
6. Build a Culture of Engagement
Outstanding communities aren't made in a day; they grow over time, shaped by culture and people's mutual consent. You can do the following to keep your slack community vibrant:
- Formulate and communicate clear regulations on behavior and posting
- Do not stifle the healthy flow of ideas; encourage respectful dialog and inclusivity
- Take time to honor the wins and acknowledge the contributions made
- Change the moderators or the event hosts regularly thus preventing their burnout
- One of the things using tools like Google Drive, Notion, or Suptask can greatly enhance productivity in a business setup.
For example, Suptask is a tool that helps you to convert Slack messages into formal tasks, that is very useful for teams doing support work or for collaborative workspaces.
Final Thoughts
Establishing a Slack community is a wise decision for the authors, small businesses and hosts who aim at a rapid and neat group communication. Even though it does not have all the features of multi-functional community platforms yet it is very good at live conversation and collaboration.
It's possible to follow the steps in the article and through engagement maintain the joyful, hospitable spirit of your Slack space for the users who will cherish being its members.


